Warning: This blog post is thorough — and free! Please leave me some love in the comments if you enjoyed this or if it was helpful.
When I decided to launch my new handmade product business, I knew product photography would be an important part of selling, but I had no idea how to create photos that would help me sell my product.
I tried searching online, I searched for videos on Youtube and blogs and couldn’t find anything remotely helpful! In fact, the most helpful thing I could find was videos on food photography! It was more relevant to me since they are photographing things up close to help you imagine eating/consuming something.
So, while this is absolutely not a tutorial on photography or how to use your camera, this IS a comprehensive guide to great product photos. And yes, there’s a big difference.
Here are the things I’ll cover, and most of it doesn’t have to do with being a photographer. In fact, if you’re already a professional, you likely don’t need this post at all.
If you’re an average person who knows how to use a phone or you have a basic camera with the ability to use manual mode, and you want to sell a LOT of products online – then this is for you!
Things I’m covering in this post:
- Why product photography is important for more sales
- Camera gear
- iPhone settings & apps
- Lighting
- Lightboxes
- Backgrounds
- Props
- Important sizing for e-commerce
- Post-editing apps & software
- Having an assistant/helper
- Bonus: Add video
Why Great Product Photos Make You More Money
Very simply, in the world of e-commerce (selling physical goods online), your customers have no way of holding your product, smelling it, tasting it, or experiencing your product in person.
If they’re at the mall, they can try on the jewelry, they can taste a sample of the tea, they can see how the hat looks on them in the mirror.
When making a purchase online, people typically make their buying decisions off of three things: the photo, the description, and the reviews.
That’s all they have to go off of. I don’t know about you, but I oftentimes observe my own buying behavior online, and I definitely pay more attention and make purchasing decisions when there’s an eye-catching photo.
Your job as a business owner is to make the buying decision EASY.
Your customer’s brain is assimilating all kinds of information and emotions based on one single image or series of images you provide. They are trying to imagine if they see themselves with your product or not. They are trying to imagine if this would make a good Christmas gift and if their dad or friend would be happy to receive this gift. They’re subconsciously thinking, “What will the look on their face be?”.
There is data out there showing people don’t make any decisions unless they first imagined themselves doing it first.
That’s why in my education companies, I take potential customers through an, “Imagine your life when you can do XYZ” scenario.
An image says a thousand words, as they say, so if you want to make triple your current sales, get some good product photos!

What Kind of Camera Gear Do You Need?
As a forewarning, I am 1000% not a photographer! But I’ve learned a few tiny things that have helped make our photos a bit more professional. As our company grows, my intention is to hire an in-house photographer & graphic designer so I don’t need to do this — but hey — until then, I will continue to take the photos and set the creative tone & direction for our products.
When you’re starting out, any smartphone with a portrait setting or feature will do the trick.
The important thing is you want to make the PRODUCT the feature of the photo, not the surroundings or the cute props.
This is a fine line because the background and the props help to set the mood and tone, so we need to see it a bit, but it’s better to have the product at the center and blur out the props and surroundings so they become the passive, not active focus.
You can achieve this with any smartphone device.
This was all I used when I was testing the “proof of concept” — which means I took photos of my minimum viable product with dummy labels and posted it online to see what the reaction would be. Does anyone care? Does this look and sound even remotely appealing to people in my niche? I was able to get feedback with my initial photos. That was vital information for me to collect which helped give me the confidence to launch my company.
Today, as we get ready to cross the $1,000,000 in our eighth month of business, we STILL use iPhone photos and videos for all kinds of promotional materials, and especially for social media. Some of our best performing content is organic-looking content taken with everyday devices.
If all you have is the camera on your phone, learn to use all features it offers, and look into additional apps like Camera+2 app which allows you to hack additional features on your phone for even better results.
However, for your Shopify store, to look really professional, we want to use a good camera whenever possible.
I don’t have anything fancy. I use a DSLR Canon Rebel. I like it because I can do some nice video shots with it also!
Best Lighting For Product Photos

This one might be more obvious but it becomes so important when you go to actually take photos! We want bright natural light whenever possible!
I have my photoshoot table set up next to a window. If it’s sunny outside, I have to wait until the afternoon until the sun is high enough that it doesn’t beam in through the window.
What we do NOT want is direct sunlight right on the product. That’s totally fine for casual social media photos (say, of your customers smiling with your product in the sunshine), but for professional photos, the light is way too harsh and direct. A cloudy day seems to work the best for my set up.
You need to find a spot somewhere that gets lots of natural light coming through. Indoors is much easier to control than outdoors, especially if you have a “set” with props.
I usually set a table up next to a window, so the light is coming in from the left or right side. If your product is shiny, you’ll have to be very aware of light glares on the bottle/packaging. That’s why indirect light is important.
The other type of lighting you might use is artificial lighting. I sometimes need to use box lights or my ring light for extra brightness if there’s a spot that’s too dark. Usually these lights are way too bright, but I will diffuse or dim the light by hanging a sheet over it.
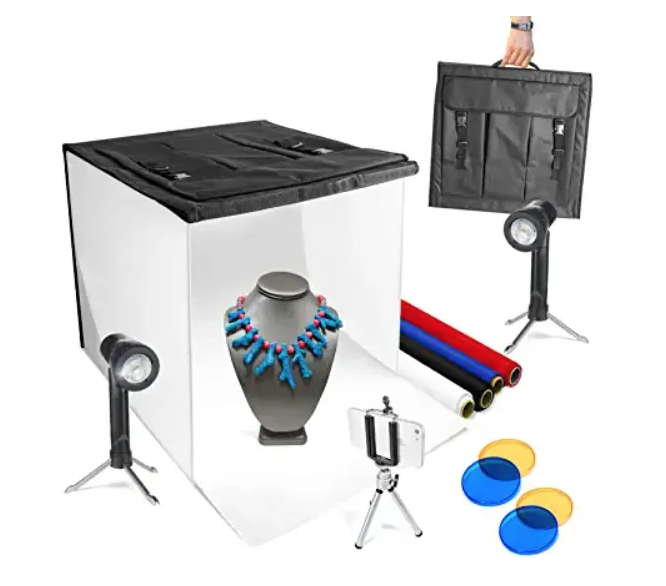
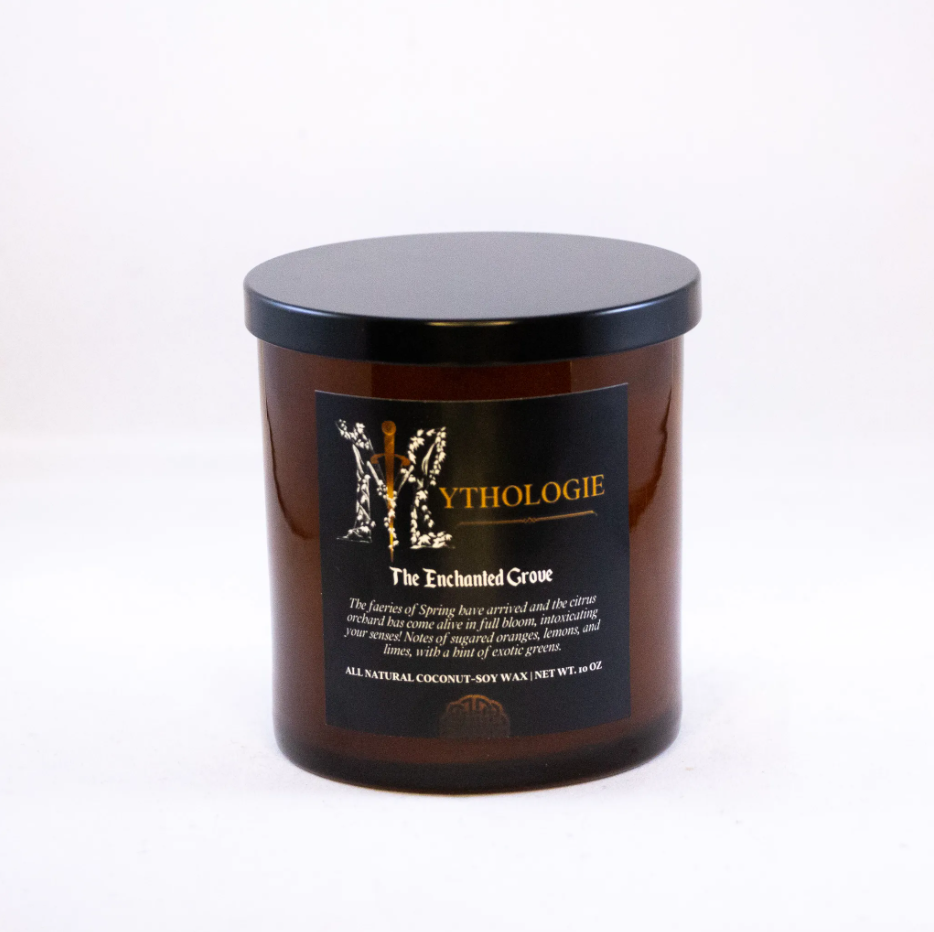
Another use for artificial lighting is what we call lightbox images. You know those super clean product photos with the perfect white background? They aren’t photoshopped (well, they can be), usually they are taken in a light box.
The great thing is that box lighting, ring lights, and light boxes are all fairly cheap and easy to find!
Most customers appreciate seeing both a “mood” photo and a lightbox photo with the white background, so they can see exactly what they’re getting. That said, you’ll need to study your own audience and learn what types of images resonate most with your customers. Poll them!
Create an Engaging Background For Your Photos

The “Before” The “After”
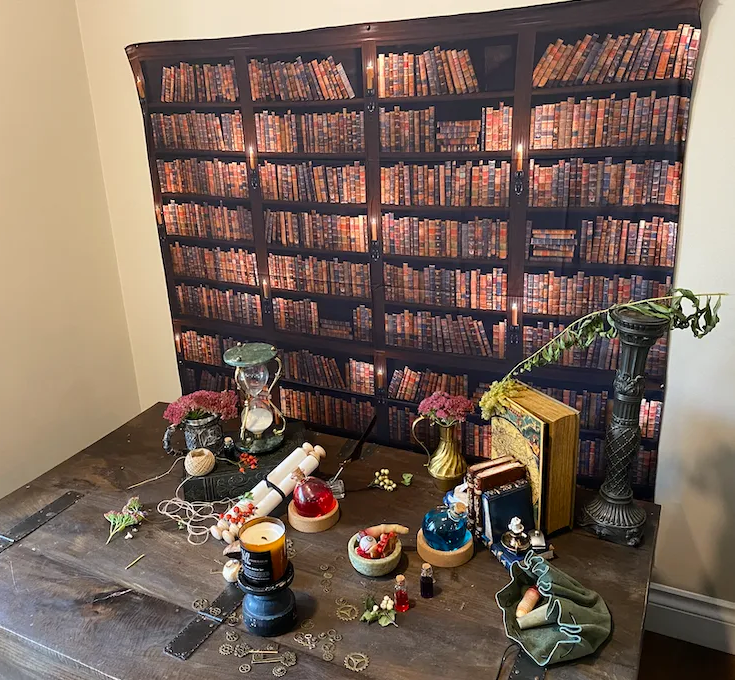
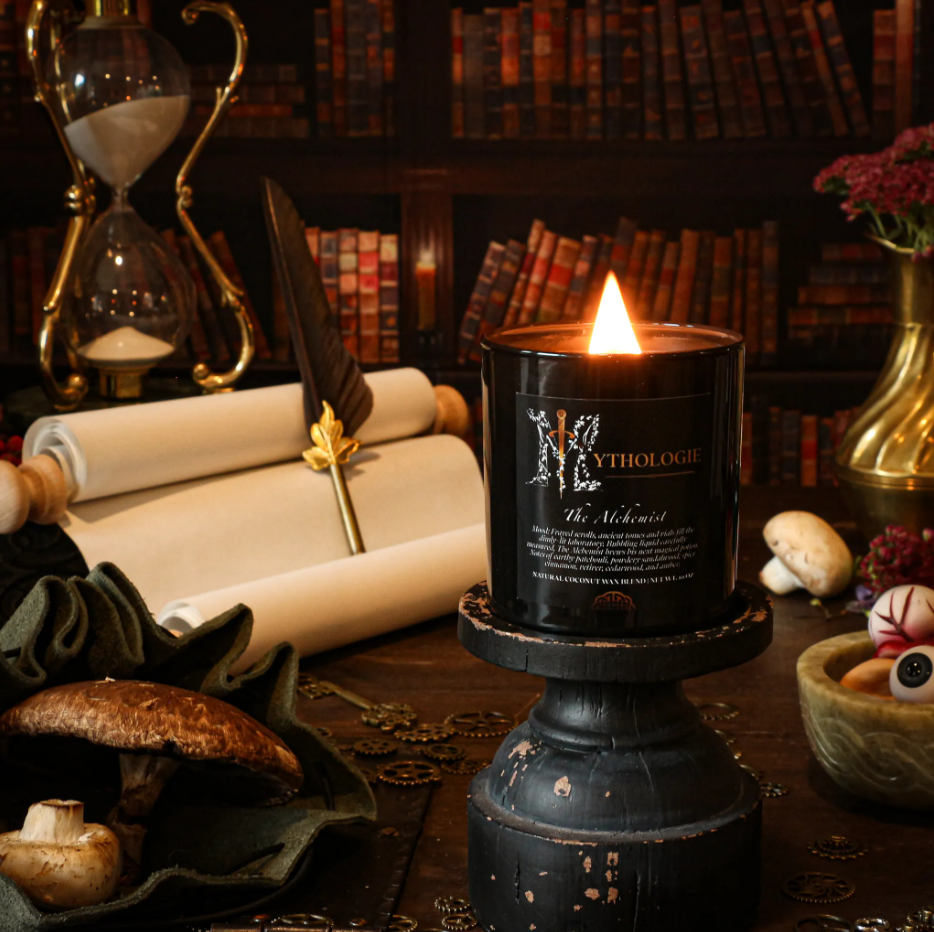
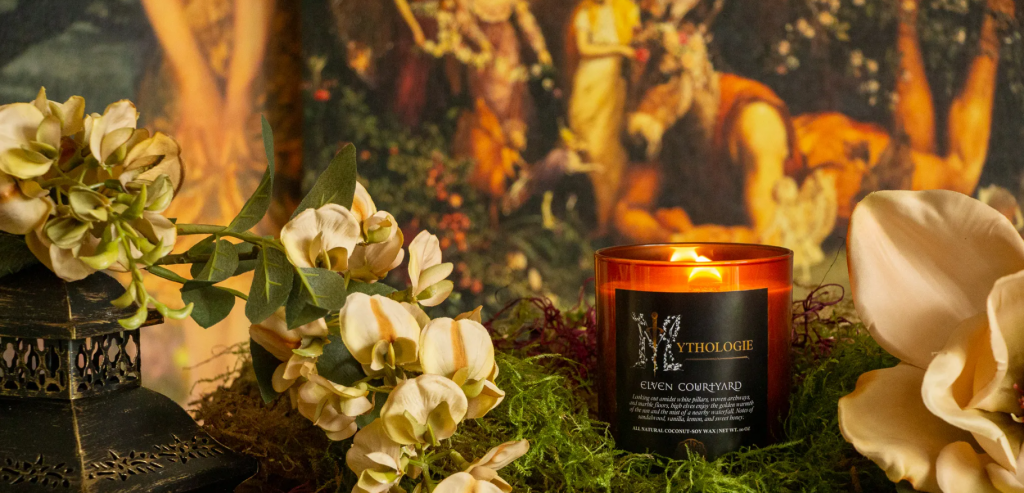
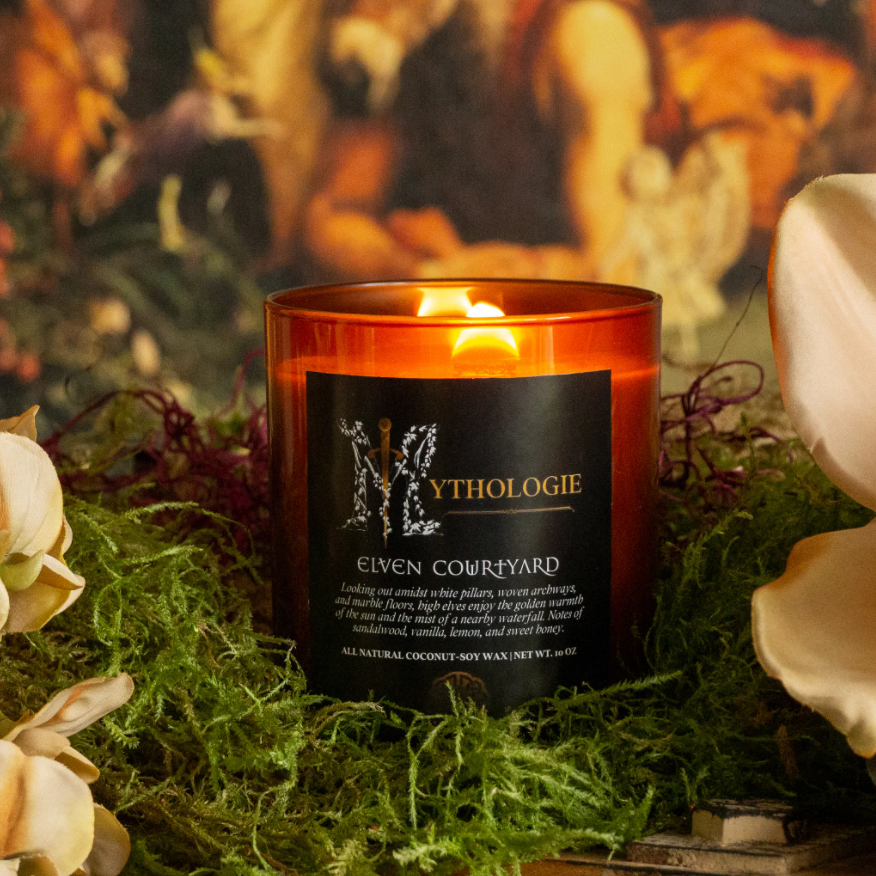
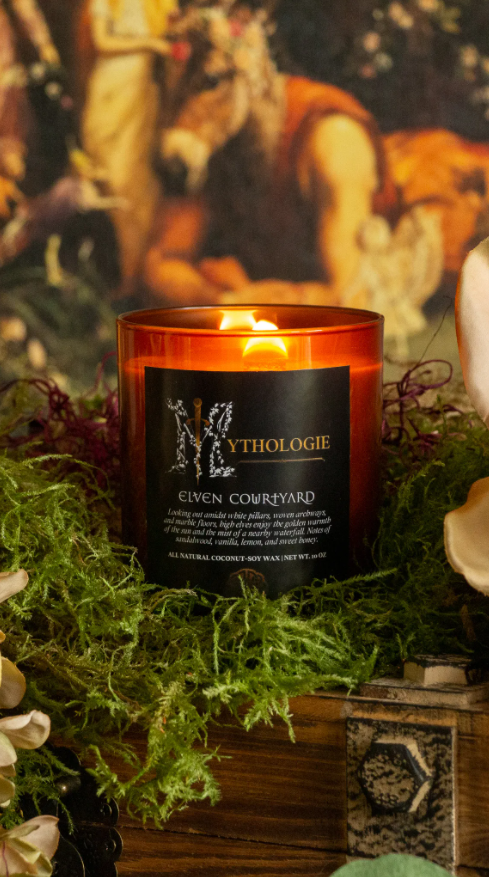
I also struggled to find backgrounds that created the right mood for my very specific products. Each candle I create is its own theme, so trying to create the right mood can be a real challenge. I’ve tried many different things, from outside and nature to canvas art, plain walls, and more.
Currently, my favorite and least expensive backgrounds are cheap tapestries off of Amazon or eBay. You can also use vinyl photography backgrounds too, but they are often a pain to store away as you need to roll them up. The fabric tapestries are extremely thin and take up hardly any space for storage and are usually very cheap!
The background below is only $20 and it’s like a very thin layer of polyester, so you’ll find thousands of different prints for all types of subjects. Depending on the size you get, you can fold it up to about the size of a small hand towel. Great for storage!

Where to Find Props And How to Place Them
First of all, your products may not need props in the photo! Don’t automatically assume that. Instead, ask the question: Would props help tell the story of this product or take away from it?
If the answer is YES, props will help convey the mood, theme, taste, smell, texture, etc… then you’ll want to add props to your photos.
Props are sometimes hard to find, but once you get on a roll, this part should be quite fun.
First, your product image needs a theme.
What are you trying to communicate?
What mood and feeling are you trying to invoke?
Before trying to make it work, just do a giant brain dump of all the items you can think of that would go with your theme.
Next, start scavaging what you have around the house and ask friends for any items you can borrow.
If you have thrifting skills this is a fantastic place to find cool items. Lastly, I head over to Amazon and look for specific items there I can’t find elsewhere.
Here are some of the props I used for one of my candle shoots. I bought several of the items on Amazon.
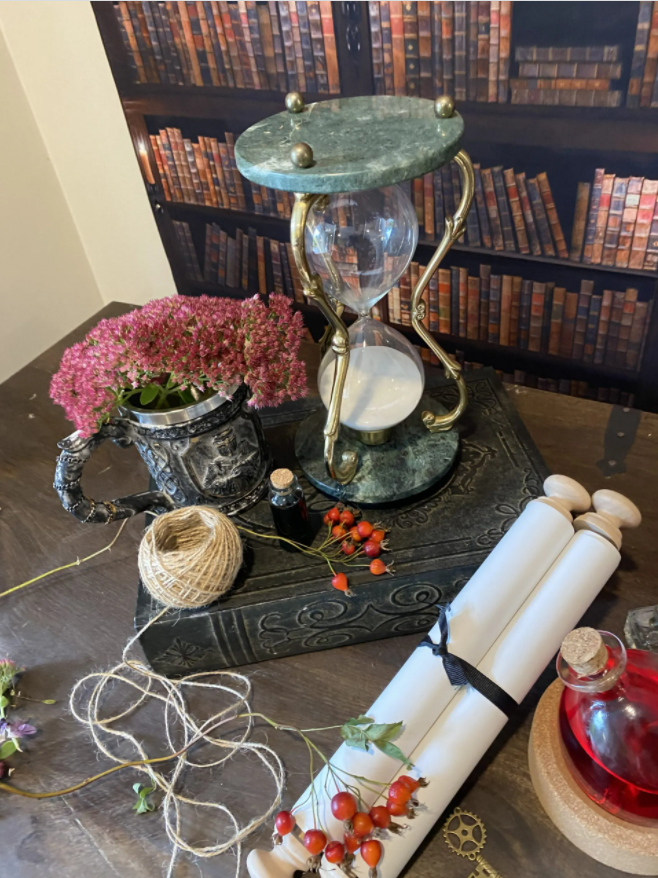
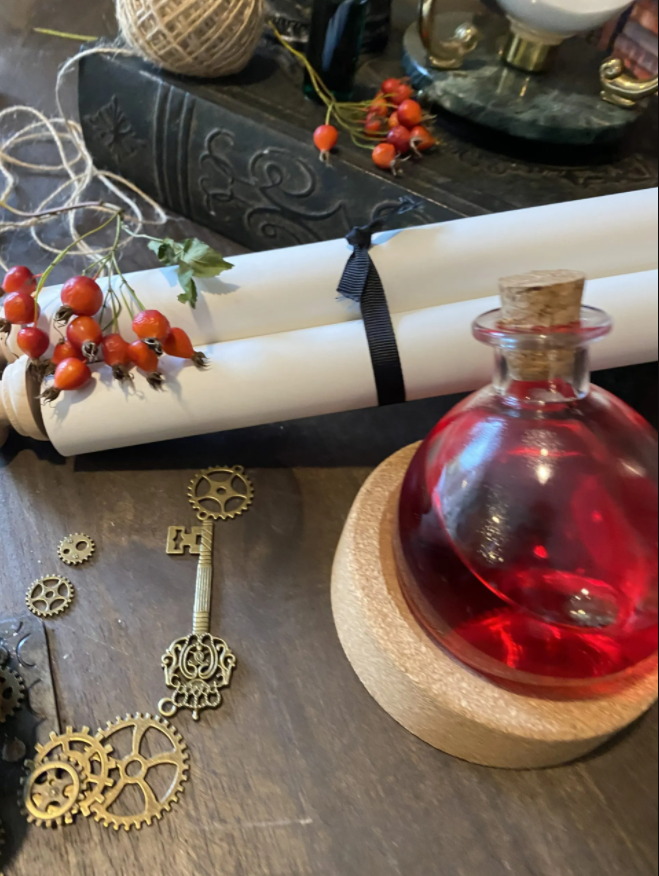
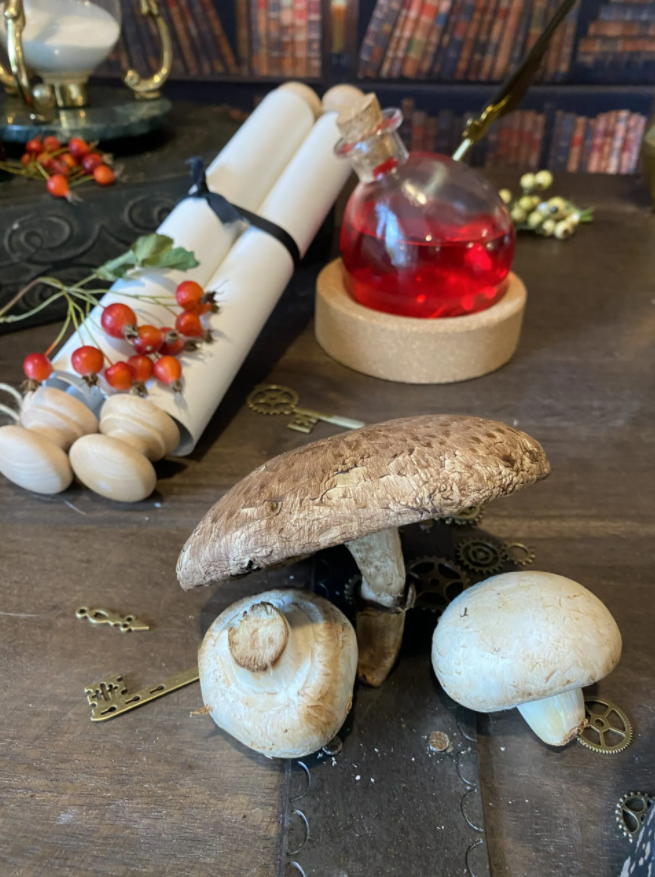
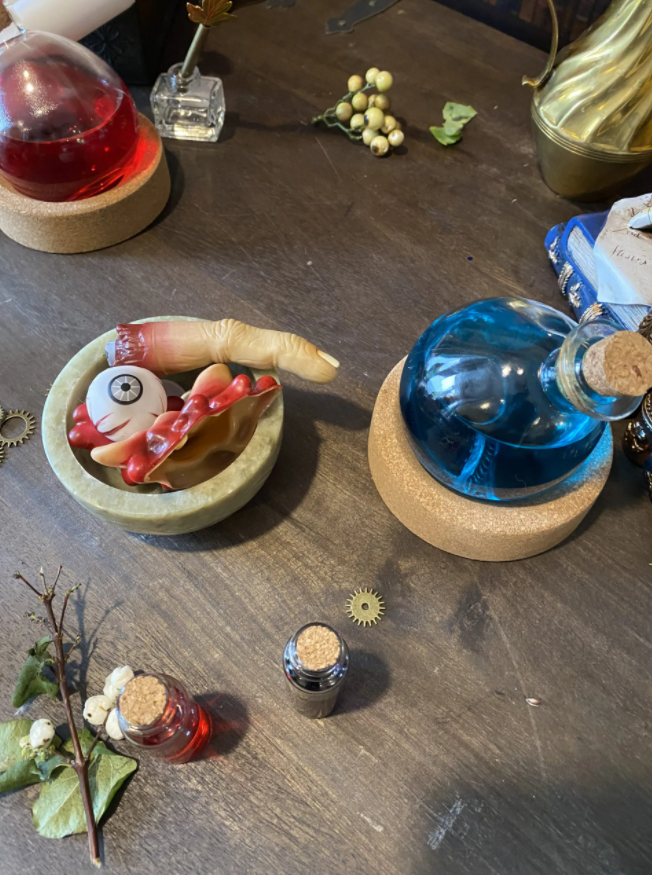
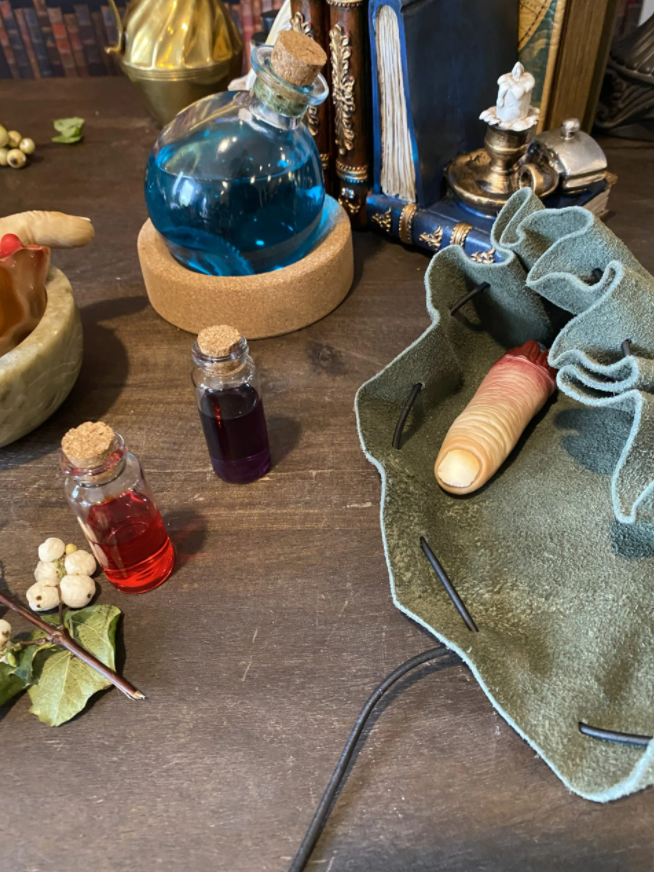
Don’t underestimate the beautiful effect of flowers, leaves, sticks, berries, and natural things you can find right outside your house. If you’re taking photos for a product in the seasons ahead, my next go-to is Hobby Lobby or Michaels for florals. Often times they will have out of season items on sale.
By the way, I’ve dedicated two whole IKEA cubicles to organizing all my extra props and decor for photos, since we release four big collections a year! That’s a lot of props and photos and it can become a huge mess if you don’t have a system for organizing (trust me, I know!)

As for how to place your props, it’s all about how many things you have in the image and what you want to show up. If your brand is very light, bright, and spacious, then you’ll want only a few things, if any.
For my products, I have a lot going on to really help set the mood in order to make the buying decision easier.
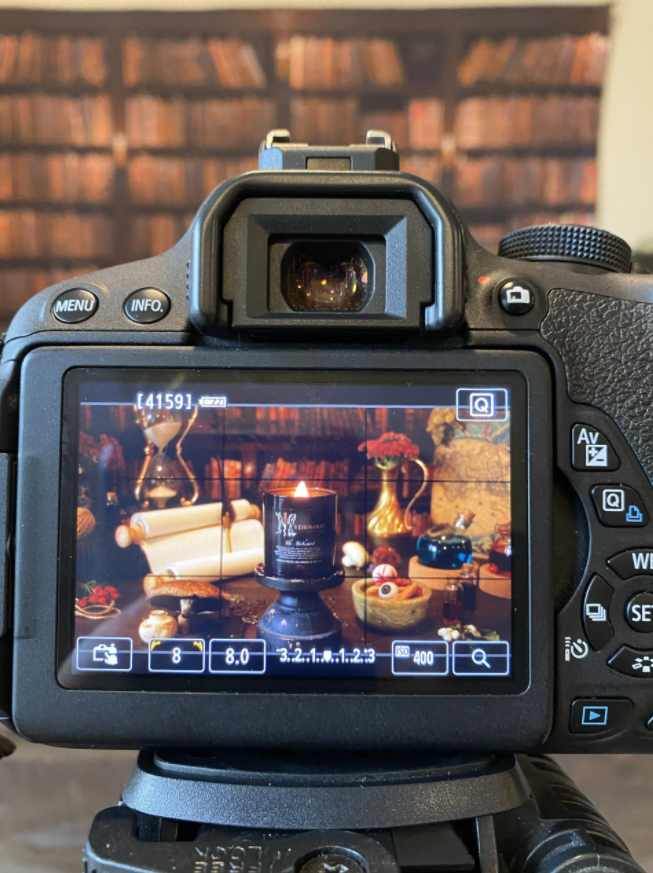
I like to really fill in space and gaps and then when I go to make a square image (more on this below), you really don’t see most of it, except for what’s around the product. This involves having my camera set up on a tripod and turned on and in focus, and then constantly moving things around for a couple of hours until I’m happy with where everything is. Now is the time to be picky, but not a perfectionist!

Important Photo Sizes For E-Commerce
There are only three aspect ratios you really need in e-commerce.
1) Full landscape
Full landscape images are for your Shopify store as background images. I use this dimension for the main hero image at the top of my home page, which I swap out with each new collection or feature product. We’re generally changing that image every 2-3 months.
2) Square image
The square images are for your product page. If you’re on Shopify you can upload any type of image, but the best user experience is square images. Specifically for product page photos -make sure your main image is quite cropped so it’s mostly your product filling the space.
You can add an additional photo showing more of the “scene” if you want, but initially, you want the focus on your product. Try to make all your product photos fairly uniform so when you go to view “All Products” your product images don’t look completely random!
3) Tall 9:16
This dimension is for Instagram Stories and Reels. Most people don’t like turning their phones sideways so you’ll want to crop some of your images to that ratio so it fits nicely on Instagram. I find I need to take a few photos quite zoomed out in order to get a crop the way I want it to look.
Landscape Square Image Tall for Instagram
Make Your Photos Look Better!

Once you have some great photo content to work with it’s time to make them pop in post-editing!
Please once again understand that I am not a photographer and have very little understanding of software, Photoshop, or editing photos in general. So if I can pull this off, so can you!
The good news is since the boom of Instagram and photo apps, we’ve all become slightly familiar with basic things like contrast, brightness, and hue.
I personally like to edit my photos in Adobe Lightroom. I believe this is the Kindergarten version of Photoshop. You can’t manipulate photos in this app, you can only alter the lighting, and all the settings we’re used to.
If you’re more advanced, definitely use Photoshop or other photo apps. The important thing is that you find a way to improve the light, make your images pop, and possibly add to the mood.
If you know a graphic artist, you can also send your images to them to improve! I’m always game for outsourcing too.
Have a Helper For Your Photoshoot
The process of creating the set, choosing the right background and setting the props upright can be quite a process (and hard on the back!). I definitely encourage you to have an assistant helping you.
I pay my daughter, Elektra, to help me with each shoot and it goes so much smoother! Once things are getting close to the way we want it to look, I’m looking at the camera screen and directing her to “move that candle slightly to the right”, and “move that leaf slightly backward.” It would just take forever for me to do it all myself. This is a great time to employ one of your kids for help!
And they’ll get to take some pride in the finished product!

BONUS: Create Video Content While Your Set is Ready
Creating video content for your products is a big topic, but I wanted to add this here because it’s so important to help your sales! If you’re introverted, you can relax. You don’t necessarily need to be in the video, but your product does!
Something as simple as taking video of your product just sitting there can get a lot of engagement!
Here are some other ideas for video, using your phone or a DSLR camera.
- Behind-the-scenes of your photoshoot. Let people see the mess of your set! Show them the props, the background, and even talk about where you go things. Customers LOVE to see behind the curtain.
- Beautiful video of your product. Just showcase your product. If it’s a candle, you’ll show video of it burning. If it’s tea, show footage of pouring hot water over the steeper. If it’s soap, do a super close-up of the lather in your hands.
- Founder’s message. Talk directly to your customers and followers and tell them about the features and benefits of your new product or collection and why it’s exciting for them.
If you film several minutes of content that can give you many weeks of content! We call that “batching”. The more content you create at once, the more you’ll have to work with and you won’t need to set everything back up again. I do often leave my sets for a while before putting everything away because almost always something didn’t turn out or I need an additional angle or video I forgot about.
Here’s a video I made with my DSLR Canon Rebel. It took me a total of 2-3 minutes to make and helped us sell a lot of candles! I just added this task on to the end of my photo shoot so it was there, ready to edit.

WHEW!!! That was a long post! But when I went to write this I knew it would be a lot. It’s not the same as a video lesson with over-the-shoulder examples, but since I get asked a lot of questions I wanted to be thorough.
What has helped you create great product photos you are proud of? Did I miss anything?
After reading this do you feel more confident to try taking photos of your products?